
1-208-754-4884

How to Choose the Best LED Tunnel Light?

Choosing the right Led Tunnel Light is not simply a matter of selecting the highest wattage. A tunnel is a demanding visual environment. Drivers enter bright daylight, pass through darker zones, and need stable visibility within seconds. Poor lighting can create glare, harsh shadows, or confusing luminance changes. Small errors matter.

Lighting researcher Peter R. Boyce emphasizes that lighting should support comfortable seeing, not merely provide brightness. This principle deserves attention when comparing tunnel fixtures. A reliable Led Tunnel Light should deliver consistent luminance, controlled glare, suitable color rendering, and minimal flicker. Its housing must also resist dust, moisture, vibration, and impact. Look for appropriate IP and IK ratings. Check thermal performance, driver quality, and maintenance access.

Real conditions often expose weaknesses.

A fixture may perform well in a showroom but struggle inside a humid tunnel. A narrow beam can create bright patches between darker areas. Excessive color temperature may also feel cold and uncomfortable during long drives. These details are easy to overlook. I have seen specifications appear impressive while installation limitations increased maintenance work. That uncomfortable possibility should remain part of the evaluation.

This guide explains how to compare optical design, energy use, lifespan, controls, and total operating cost. It also considers tunnel entrances, interiors, exits, emergency zones, and changing traffic conditions. The best Led Tunnel Light is not always the brightest or cheapest option. It is the one that maintains safe, comfortable, dependable visibility over years of service.
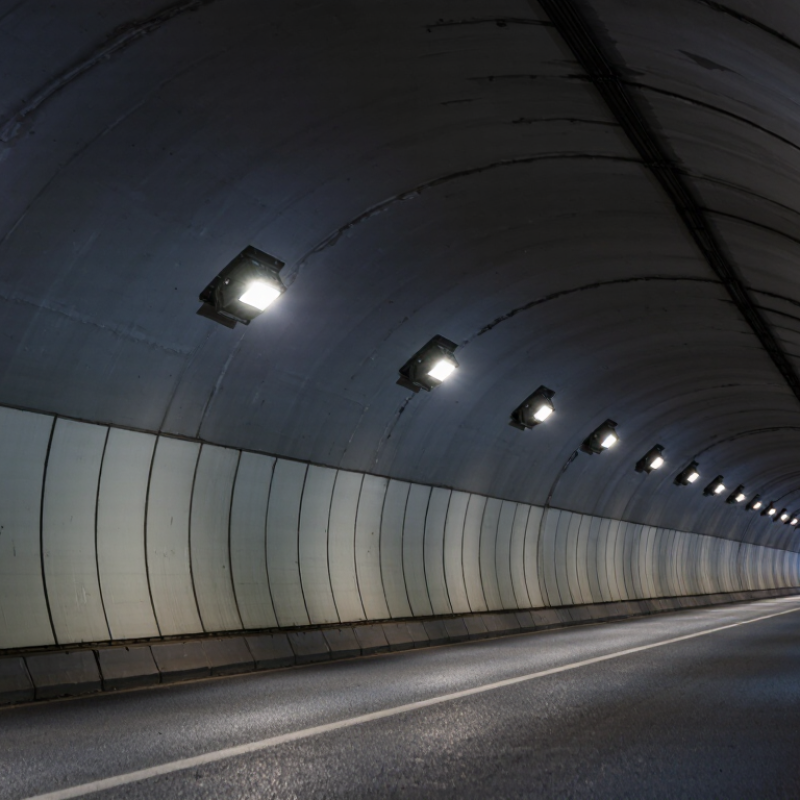
How to Choose the Best LED Tunnel Light?

Understanding LED Tunnel Light Requirements

Choosing the best LED tunnel light starts with the tunnel, not the fixture. Measure tunnel length, lane width, traffic speed, portal brightness, and wall reflectance before comparing products. Drivers need a safe visual transition from daylight to darkness. The entrance zone often demands much higher luminance than the interior zone. Use photometric calculations to check luminance, uniformity, threshold visibility, and glare. A simple wattage comparison is not enough.

Select an optical distribution matched to mounting height and lane geometry. Check maintained output, not only initial lumens. Dust, exhaust residue, moisture, and vibration can reduce real performance. An enclosure rated for site conditions helps, while impact resistance limits damage during maintenance. Thermal management matters because hot housings can accelerate lumen depreciation. Choose a suitable color temperature and strong color rendering when signs, obstacles, and vehicle details must remain clear. Assess flicker, especially when cameras monitor moving traffic. Control systems may support dimming and daylight response, but test compatibility on site.

Do not ignore maintenance access. During commissioning, measure actual luminance and uniformity at representative points. Compare those results with the design calculations and applicable road authority requirements. Keep records of temperatures, cleaning intervals, failures, and energy use. These details reveal whether the lighting performs reliably after installation. A field test may expose dark patches that software missed. That is not a failure of the process; it is a reason to adjust aiming, spacing, or output before acceptance.

Evaluating Key Performance Specifications

How to Choose the Best LED Tunnel Light?

Evaluating Key Performance Specifications

A tunnel light should be judged by performance, not by lumen output alone. A high lumen figure can still mislead. Check the measured illuminance across the road surface, walls, and entrance zone. Uniformity matters because dark patches can strain drivers’ vision. Useful specifications include average illuminance, minimum illuminance, and longitudinal uniformity.

Glare control is equally important. Review the light distribution curve and the calculated glare rating for tunnel applications. A suitable beam should direct light onto the pavement without shining sharply into drivers’ eyes. Color temperature and color rendering also affect visibility, especially near signs, lane markings, and emergency equipment. Numbers need context.

Efficiency should include real operating performance, not only laboratory claims. Compare system efficacy, input power, driver losses, and dimming behavior. Heat matters. Check the rated operating temperature, housing material, thermal path, and expected lumen maintenance. In wet or dusty tunnels, verify the IP rating and impact resistance against the site conditions. A stronger enclosure may reduce maintenance, but it can also increase weight and installation difficulty.

Ask for independent photometric reports, test methods, and warranty conditions. Confirm whether performance data applies to the complete fixture. Request installation calculations for spacing and mounting height. Do not guess. Control compatibility deserves attention too, since scheduled dimming can reduce energy use during low-traffic periods. A specification sheet may look complete, yet field results can differ when ventilation, dust, or aging are ignored. That gap deserves honest review.

How to Choose the Best LED Tunnel Light?

Evaluating Key Performance Specifications

The chart compares representative LED tunnel light specifications with practical selection baselines. A score above 100 indicates performance above the baseline, while a score of 100 meets it. Always verify photometric calculations, operating temperature, ingress protection, impact resistance, lifetime rating, power factor, and color rendering requirements for the specific tunnel project.

Matching Light Distribution to Tunnel Design

How to Choose the Best LED Tunnel Light?

Matching Light Distribution to Tunnel Design

LED tunnel lighting should follow the tunnel’s geometry, not merely its ceiling grid. A narrow, straight tunnel may suit a symmetric distribution with strong longitudinal reach. Curved sections often need controlled lateral spread, especially near walls and emergency walkways. CIE 88:2019 links threshold-zone luminance to driver adaptation, approach brightness, vehicle speed, and stopping distance. The required value is not universal. That matters.

Specify photometric files, not only wattage. Check maintained luminance, uniformity, glare, flicker, and light spill on wet pavement. PIARC’s Road Tunnels Manual notes that lighting can represent up to 30% of tunnel energy consumption, making optical efficiency important. A well-shaped beam can reduce over-lighting while preserving visual guidance. However, energy savings should never replace visibility testing.

Measure the actual tunnel.

Install sample luminaires at the planned spacing, then inspect lane markings, wall edges, signs, and vehicle silhouettes from a driver’s viewpoint. A perfectly uniform ceiling is not always the best answer. Excessive contrast can still feel uncomfortable, even when average luminance looks acceptable. Maintenance also changes the result: dust, aging, and failed units reduce performance. Include a maintenance factor in the design, as recommended by CIE and relevant national standards. I would not approve a layout from simulation alone; field validation often reveals details the model misses.

Comparing Installation, Control, and Maintenance Options

How to Choose the Best LED Tunnel Light?

Comparing Installation, Control, and Maintenance Options

Installation decisions shape tunnel safety and long-term operating costs. Measure the ceiling height, lane width, and mounting spacing before selecting beam angles. A narrow beam can create bright patches on the road surface. A wide beam may waste light on walls. Check the housing’s ingress and impact protection for dust, water, and vibration. Use stainless mounting hardware where moisture and road salt are common. Leave enough clearance around drivers for heat to escape. Tight spaces often shorten component life.

Control systems should match traffic patterns, not merely offer more settings. Photocells can adjust daytime output, while sensors can respond to vehicle movement. A programmable controller can reduce lighting levels during quiet hours. Keep emergency lighting independent and fail-safe. Confirm that the control system supports smooth dimming without visible flicker. Test signal cables beside power cables; interference can cause unexpected changes. This detail is easy to miss.

Maintenance begins during installation. Choose luminaires with accessible drivers and replaceable surge protection. Record each unit’s location, operating hours, and fault history. Clean lenses on a planned schedule, especially near entrances where exhaust deposits collect. Inspect connectors for moisture and inspect mounting bolts for loosening. In practice, maintenance teams may not follow perfect schedules. Design for that reality.

I once saw a well-lit tunnel develop uneven patches because cleaning was delayed and output was never rechecked. Measure illumination after repairs, not just before opening.

Assessing Safety, Energy Efficiency, and Total Cost

Choosing the best LED tunnel light starts with safety, not brightness alone. In field inspections, uneven lighting often creates dark patches near walls and road curves. These areas can hide obstacles and increase driver stress. Check the light’s photometric distribution, glare control, color rendering, and flicker performance. A reliable design should support clear visibility during entry, transition, interior, and exit zones. Emergency operation also matters when normal power fails. Test the actual installation, not only the laboratory data.

Energy efficiency depends on more than wattage. Compare useful lumens per watt, dimming response, heat management, and operating schedules. Tunnel lighting can waste energy when controls remain at full output during low-traffic periods. Sensors and adaptive dimming may reduce consumption, but only when they react smoothly. Sudden changes can disturb drivers. Verify control settings during daytime, nighttime, rain, and maintenance conditions.

Total cost includes purchase, installation, cleaning, replacements, electricity, and downtime. A cheaper fixture may become expensive if its seals degrade or its driver fails early. Review ingress protection, impact resistance, warranty terms, spare-part access, and documented testing. I once focused too heavily on energy savings and underestimated cleaning labor. That was a useful mistake. A simple cost model should use local electricity prices and realistic maintenance intervals, rather than optimistic estimates. Safety still deserves the highest weight.